Intro
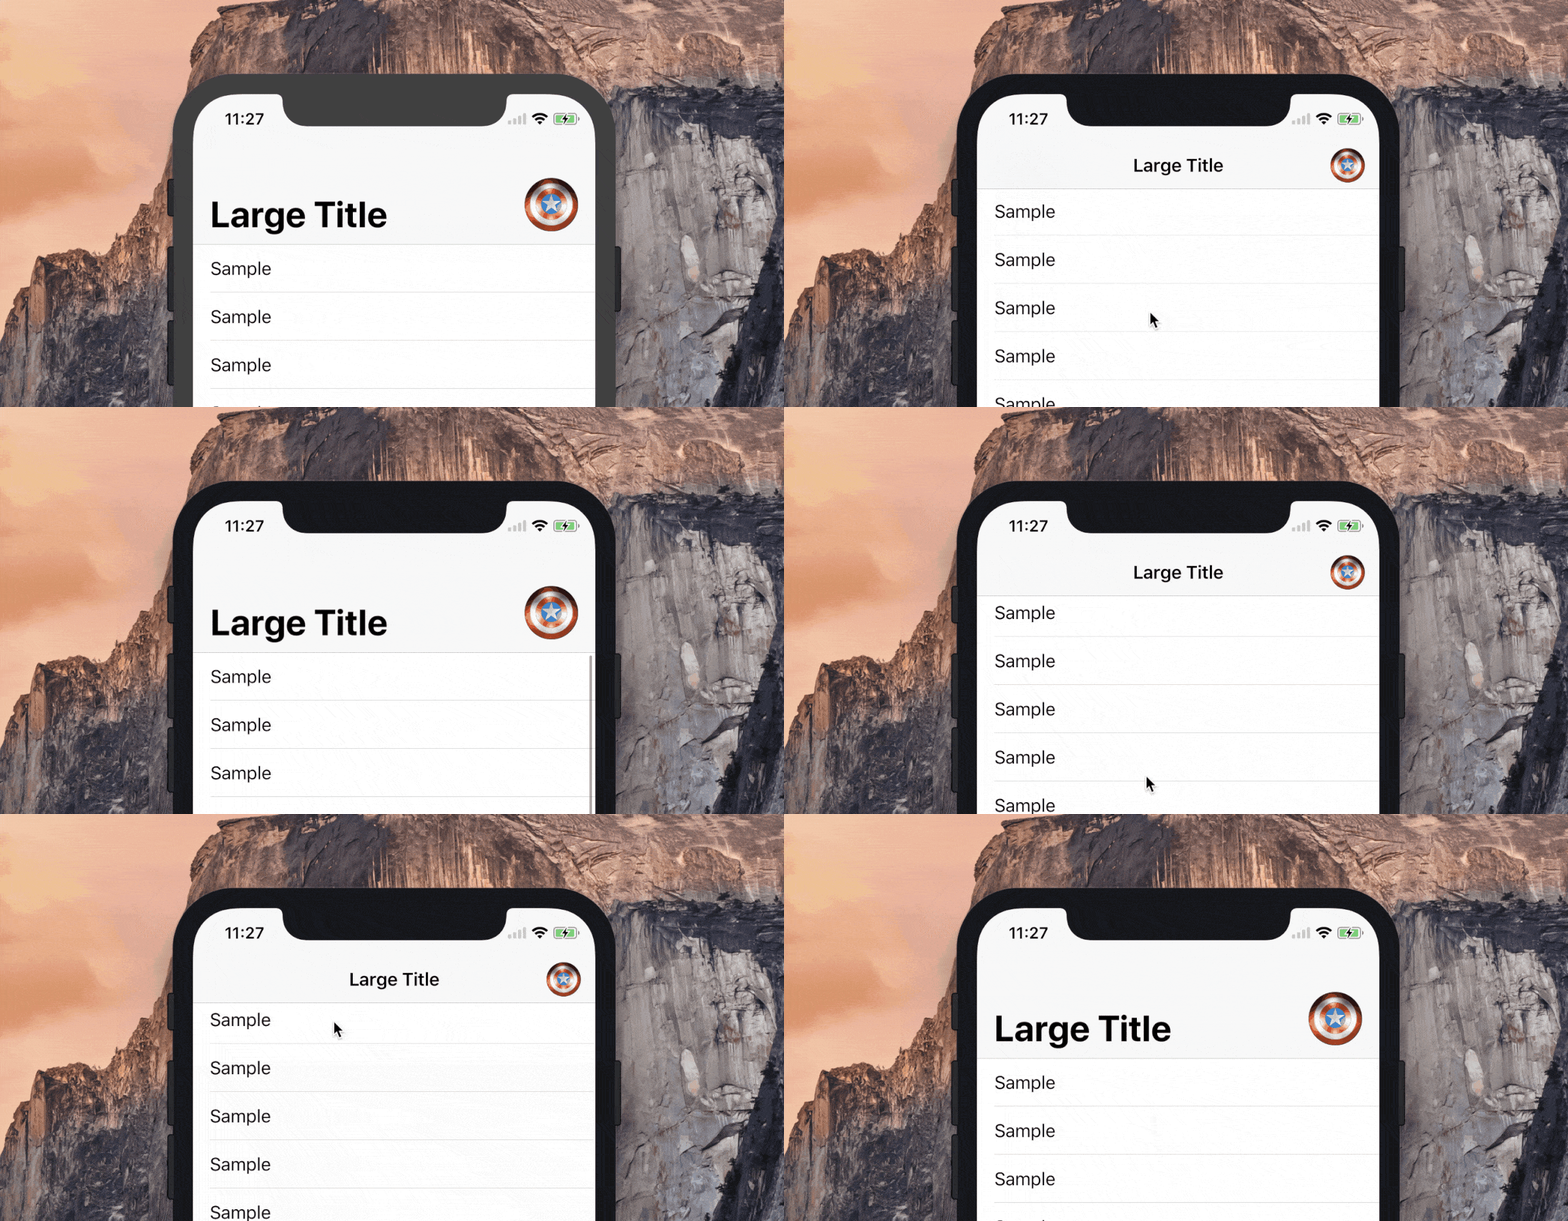
This 5-steps tutorial shows the implementation of an image which resizes according to the height of navigation bar with a large title (iOS 11). You may see the demo above ☝️.
Let’s jump right into coding 👨💻!
Step 1. Creating an image
Declare a property in a class scope:
Note: it could also be a UIButton or anything that is a subclass of UIView.
Step 2. Add Constants
Your design is unique 🦄: add a Constants structure with your custom sizes and margins. Just copy&paste the code below into the class scope and edit according to your designs:
Note: I recommend reading the descriptions to properties to make sure to do it the right way.
Constants visualization:
a) Large Navigation Bar state

b) Small Navigation Bar state

Step 3. Initial UI setup
Create a method to make initial image UI setup:
Note: don’t forget to call this method.
Milestone #1:
Run your project and check if there are no layout errors in the console and if the image is showed up properly. Please, note that the image won’t resize yet.

Step 4. Resizing method
Create a method that will resize and move the image in the navigation bar:
Shortly about what this method does: change the size of the image using .scaledBy. Also, move the image using .translatedBy since we want to:
- keep the right margin constant 16pt
- change the bottom margin from 6pt to 12pt.
Step 5. Implement UIScrollView delegate method
Add delegate method of UIScrollView and call the method from the previous step:
Milestone #2 (final 🏁):
Run your app and check if it’s resizing properly when you scroll down/up:

Step 6. Hide image (optional)
In case you need to hide the image from navigation bar when navigating to another screen in your navigation controller stack add these methods:
Step 7. Action on image tap (optional)
In case you want to perform an action by tapping the image follow this answer.
You are done 💪
Complete project on GitHub.
Please feel free to leave me a comment in case you have additional questions.
Find out more about iOS on my Twitter.




.avif)


